How to Create a Custom Web Browser Extension
How I built the "Proton Launcher Unofficial" extension for Chrome and similar browsers
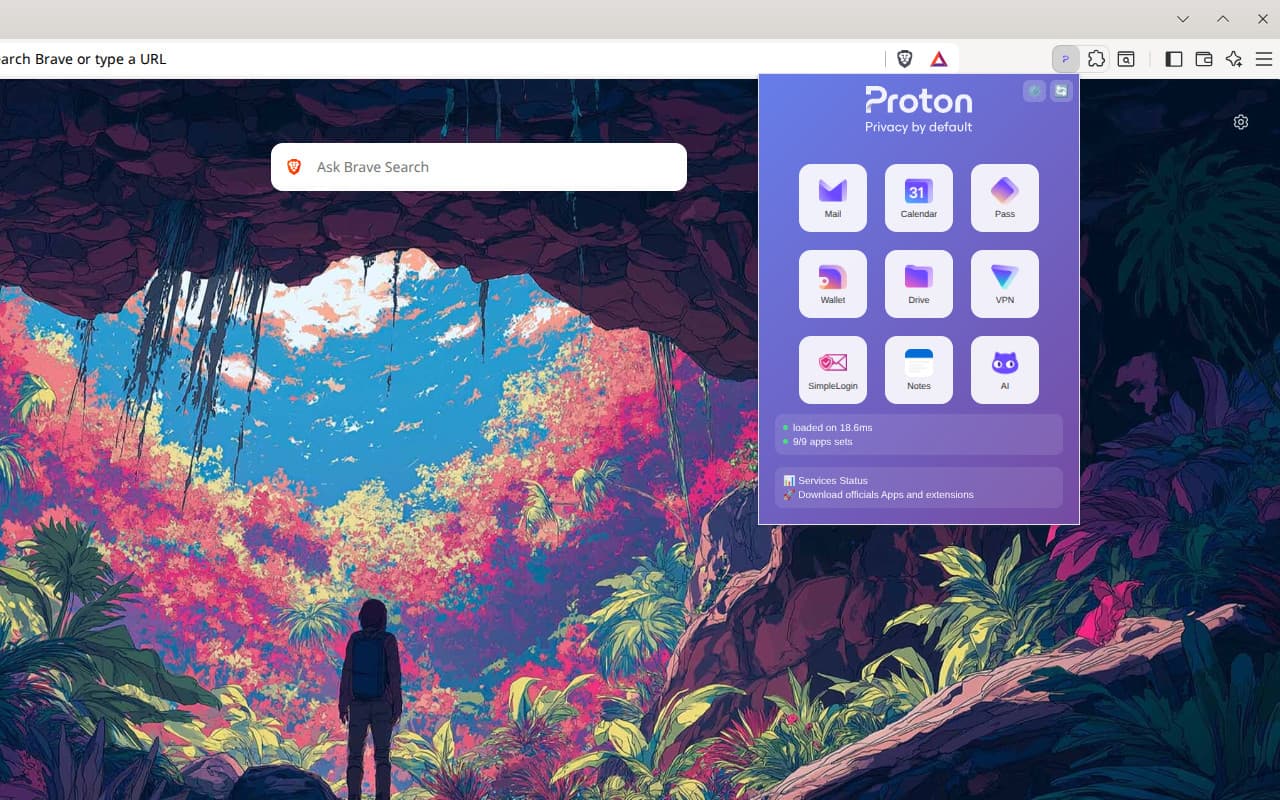
An extension that allows you to quickly launch Proton sites from a customizable grid, with connection status and shortcuts.

First of all, I'm not affiliated with Proton AG. But if you want to hire me, just lets call.
This extension is an independent project, with no ties to Proton AG or its official products. This extension is for accessing Proton services, just a popup with links to Proton services.
Note: I create this to be used as a template to anyone create a custom extension to access any other web service. Just editing the config.json and put some images.
Why? So, Why not! But wasn't it just to save to favorites? Yes. However, I wanted to create it.
Yes, I put Brave Browser screenshots on Google Chrome Web Store ;-)

Installation
Just to use it:
find in the Chrome Web Store: https://chromewebstore.google.com/detail/proton-launcher-unofficia/ajniphjinhppblnkeolojgopecjlnecn
To devs:
Download or clone this repository: https://github.com/Esl1h/proton-launcher-extension
In your Chrome/Brave, go to chrome://extensions/ and enable developer mode.
Click “Load unpacked” and select the git project folder.
project/
├── manifest.json # extension manifest file
│
├── background # service worker for events and integrations
│ └── background.js
│
├── config # configuration files
│ ├── apps.json
│ └── settings.json
│
├── popup # launcher interface
│ ├── popup.css
│ ├── popup.html
│ └── popup.js
│
├── assets
  ├── icons
  │ ├── icon128.png
  │ ├── icon16.png
  │ └── icon48.png
  └── proton-logo.svg
Edit the files in config/ to customize the default apps and preferences. User settings are saved automatically.
ShortcutsCtrl+Shift+L – Quickly open the launcher
The architecture follows a simplified MVC pattern, where popup.html serves as the visual interface, popup.js acts as the controller managing interaction logic and state, and background.js functions as a service worker for background operations.
The data structure is minimalist: each favorite is stored as an object all kept in an array under the favorites key.
Manifest V3 defines permissions (no one!) and declares a restrictive CSP (Content Security Policy), ensuring protection against XSS.
The manifest.json defines permissions, icons, scripts, and the popup (popup.html + popup.js) displayed when the user interacts with the extension icon. In short: a required manifest.json (template), the popup (CSS + HTML), and the core — plain JavaScript (no frameworks) handling link/icon loading, URL validation, and rendering.
There is also a background script (background.js) that works as a persistent worker but performs a clean initialization — the idea is to keep it for future use. The popup interface reads the configured apps (config/apps.json), displays them in a clickable grid, and opens the link in a new tab (my intent was — or is? — to open the webapp/PWA).
apps.json: Each icon has a title, icon, URL, position, and description. I chose to hide the description in the display, but kept it in the JSON.
settings.json: Grid size, update interval, and a single theme called gradient.
That's it. There's not much to say about it... it was one of my little weekend projects. It's meant to be simple, fast, secure, and easy... both to change and to use as your starting template to create something bigger.
It's not complete, the idea (there's a configuration icon in the popup interface) would be a page that you can fill with the links you want (and optionally an icon if you don't want the favicon or the default from some js icon library).
Packing and send to Web Store
Oh, before I finish, To submit the extension to the Chrome Web Store, you need to access the developer dashboard (it costs $5 to activate) at https://chrome.google.com/webstore/devconsole/.
Create a new item, fill in all the fields for requirements, description, and information, and upload the .zip file. To create the .crx file, go directly to the browser, open the extension manager, and select the “pack extension” option (after activating development mode, of course).